Android POS SDK
Integrating a PoS (Point of Sale) payment solution into your android app can be challenging mostly because, asides the wealth of technical know-how it requires, it could also negatively impact your TTM (time-to-market - the time it takes to push your product to the users).
Here's where the Smart PoS SDK comes in. Our SDK handles the heavy-lifting of integrating PoS payments, leaving you to focus on other vital aspects of your product.
It offers a simple, intuitive integration experience and also supports a variety of terminal brands (Pax, Kozen, and Telpo) so you can easily adapt it to your product and business needs.
SDK Setup
The SDK contains four (4) modules -
- "smart-pos-core"
- "smart-pos-emv-pax"
- "smart-pos-emv-kozen"
- "smart-pos-emv-telpo"
You get to add these modules based off of the terminal brands your app will run on. The "smart-pos-core" module contains the core functionality of the SDK and should be added in every case. Any of the others would be added depending on the terminal brand targeted.
Here's a table for illustration
| Terminal brand targeted | Modules required |
|---|---|
| 1. PAX | "smart-pos-core" AND "smart-pos-emv-pax" |
| 2. Kozen | "smart-pos-core" AND "smart-pos-emv-kozen" |
| 3. Telpo | "smart-pos-core" AND "smart-pos-emv-telpo" |
Add in required libraries
You would need to add in the following library files to your project.
For Pax
Download the library file here.
Open project view and place this"NeptuneLiteApi_V2.03.00_20180208.jar" file in the libs directory under the app directory.
For Kozen
Download the library here.
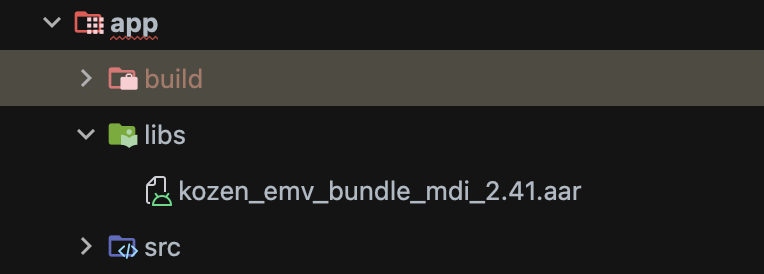
Similarly, open project view and place this file in the libs directory under the app directory.
For illustration, the structure would look like "project root directory -> app -> libs".
Add SDK Dependencies to Gradle
- Confirm maven, mavenCentral(), google() and jcenter are present in your project-level settings.gradle or settings.gradle.kts file in similar fashion.
dependencyResolutionManagement {
    // ...other configurations

    repositories {
        google()
        jcenter()
        maven { url 'https://jitpack.io' }
        maven { url 'https://mirrors.huaweicloud.com/repository/maven/' }
        mavenCentral()
        // ...other repositories
    }
}
dependencyResolutionManagement {
// ...other configurations
repositories {
google()
jcenter()
maven { setUrl("https://jitpack.io") }
maven { setUrl("https://mirrors.huaweicloud.com/repository/maven/") }
mavenCentral()
// ...other repositories
}
}- In your app-module build.gradle or build.gradle.kts file, add in the relevant dependencies. Get the latest version here
dependencies {
    // ... other dependencies

    val versionName = "2.4.6"
    implementation("com.interswitchng:smart-pos-core:$versionName")
    implementation("com.interswitchng:smart-pos-emv-pax:$versionName")
    implementation("com.interswitchng:smart-pos-emv-telpo:$versionName")

    // Pax EMV library
    implementation(files("libs/NeptuneLiteApi_V2.03.00_20180208.jar"))

    // Kozen EMV library
    implementation(files("libs/kozen_emv_bundle_mdi_2.41.aar"))
}
dependencies {
// ... other dependencies
def $versionName = '2.4.6'
implementation "com.interswitchng:smart-pos-core:$versionName"
implementation "com.interswitchng:smart-pos-emv-pax:$versionName"
implementation "com.interswitchng:smart-pos-emv-telpo:$versionName"
// Pax EMV library
implementation files('libs/NeptuneLiteApi_V2.03.00_20180208.jar')
// Kozen EMV library
implementation files ('libs/kozen_emv_bundle_mdi_2.41.aar')
}- Sync and build your project.
Potential pitfall:
- Ensure the names of your dependencies are correctly spelt, else you would get an error when building.
- Also, if you get clashes between newer android library versions and support versions, add in "android.enableJetifier=true" to your "gradle.properties" file, and rebuild.
SDK Usage
Initializing the SDK
// Choose Environment to run transactions in: Test||Production
val environment = Environment.Production

// Create config object
val config = POSConfig(
    alias = "...alias here...",
    clientId = "...client id here...",
    clientSecret = "...client secret here...",
    merchantCode = "...merchant code here...",
    merchantTelephone = "...merchant phone number here...",
    environment = environment,
    appVersion = ""
)

// Pick the relevant DeviceImpl class instance for terminal type in use

// For Pax
val paxDevice = POSDeviceImpl.create(applicationContext)

// For Kozen
val kozenDevice = KozenDeviceImpl.create(this.applicationContext)
KozenModuleHelper().createModule(this.application)


// Load the terminal with config
IswPos.setupTerminal(
    app = application,
    device = device,
    fingerPrint = null,
    config = config,
    withRealm = true
)

// This initializes the terminal and makes it ready to perform transactions
IswPos.setDeviceSetialNumber(device.serialNumber())
IswPos.getInstance().callHome()
// Choose Environment to run transactions in: Test||Production
Environment environment = Environment.Test;
// Create config object
POSConfig config = new POSConfig(
alias,
clientId,
clientSecret,
merchantCode,
merchantTelephone,
environment,
appVersion
);
// Create POSDeviceImpl class instance
POSDeviceImpl device = POSDeviceImpl.create(getApplicationContext());
// Load the terminal with config
IswPos.setupTerminal(
getApplication(),
device,
null,
config,
true
);
// This initializes the terminal and makes it ready to perform transactions
IswPos.setDeviceSerialNumber(device.serialNumber());
IswPos.getInstance().callHome();
Visit here for clear steps on how these details can be obtained from the Quick Teller Business portal.
Set Company Logo.
The company branding logo can be set by calling IswPos.setGeneralCompanyLogo() and passing the logo bitmap to the function. Here's a code snippet detailing this. The logo is a drawable resource in this sample.
val context = requireContext() // This will depend on where you're accessing it from. This is from a fragment

context.resources?.let { resources ->
    IswPos.setGeneralCompanyLogo(BitmapFactory.decodeResource(resources, R.drawable.sample_logo))
}
// This will depend on where you're accessing from. This is from a fragment
Context context = requireContext();
if (context.getResources() != null) {
Resources resources = context.getResources();
IswPos.setGeneralCompanyLogo(BitmapFactory.decodeResource(resources, R.drawable.sample_logo));
}
Access Terminal Settings
For access to extra configurations that the terminal may require, the code below will launch the settings screen. This can be triggered by a button click, menu item click or however you choose to do it.
IswPos.showSettingsScreen()IswPos.showSettingsScreen();
Potential pitfall: It is important you set this logo before attempting to initiate a transaction, else a crash will occur. This is because the receipt being printed must bear a logo.
Initiating payment
// Amounts should be converted into kobo before passing them into the SDK
val kobo = 100L
val amount = 12 * kobo // 12 Naira

// Create transaction object and choose payment type: Card||QR||USSD||Transfer||CNP||ThankYouCash||PayCode||Cash
val transaction: Transaction = Transaction.Purchase(PaymentType.Card)

// Initiate a transaction call
//Be sure to catch the NotConfiguredException which will occur when the terminal has not been configured
try {
    IswPos.getInstance().pay(amount, this, transaction)
} catch (ex: NotConfiguredException) {
    // Handle error gracefully
   }
}
// Amounts should be converted into kobo before passing them into the SDK
long kobo = 100L;
long amount = 12 * kobo; // 12 Naira
// Create transaction object and choose payment type: Card||QR||USSD||Transfer||CNP||ThankYouCash||PayCode||Cash
Transaction transaction = new Transaction.Purchase(PaymentType.Card);
// Initiate a transaction call
// Be sure to catch the NotConfiguredException which will occur when the terminal has not been configured
try {
IswPos.getInstance().pay(amount, this, transaction);
} catch (NotConfiguredException ex) {
// Handle error gracefully
}
If you need to pass in a custom reference, you can do it like so.
iswPosInstance.pay(
    amount = amount,
    activityCallback = this,
    transaction = transaction,
    merchantUniqueRef = yourRef,
    transactionRemark = yourRemark
)
iswPosInstance.pay( amount, this, transaction, 0, 0, "", "", yourRef, yourRemark );
The pay function returns a call-back (the 2nd parameter) which can be implemented either as an object or in the class directly.
The approach above makes use of the latter.
Here, you implement the "IswPos.IswPaymentCallback" interface in your class and override its member functions. This can be done in an activity, fragment or any other class.
See sample:
class MainActivity : AppCompatActivity(), IswPos.IswPaymentCallback {

  override fun onPaymentCompleted(result: IswTransactionResult) {
    // Process or print transaction result
    }

  override fun onUserCancel() {
    // Handle case for user interruption
    }
}
public class MainActivity extends AppCompatActivity implements IswPos.IswPaymentCallback {
@Override
public void onPaymentCompleted(IswTransactionResult result) {
// Process or print transaction result
}
@Override
public void onUserCancel() {
// Handle case for user interruption
}
}The table below shows the details about the data contained in the IswTransactionResult object returned.
| Field Name | Data Type | Description |
|---|---|---|
| responseCode | String | Response code. "00" indicates a successful transaction |
| responseMessage | String | Response message |
| isSuccessful | Boolean | Boolean value - True if transaction is successful. False if it's not |
| transactionReference | String | Transaction reference |
| rrn | String | Retrieval Reference Number |
| amount | Long | Amount |
| cardType | CardType | Card type object showing the type of card |
| transactionType | TransactionType | Transaction type showing the type of transaction attempted |
| cardHolderName | String | Card Holder's name |
| cardExpiry | String | Expiry date of card |
| cardPan | String | Masked Card PAN |
| AID | String | Application Identifier for card scheme |
| dateTime | String | Date and time of transaction |
| txnDate | Long | Transaction date |
| authorizationCode | String | Authorization code |
| stan | String? | System Trace Audit Number - Null if not available |
| authCode | String? | Authorization code - Null if not available |
| transactionCurrencyType | TransactionCurrencyType | An enum showing the currency of the transaction |
Potential pitfall: Be sure to confirm the status of the transaction from the responseCode string. Any code other than "00" is a failure.
That's it! You can now start receiving payments in your app.
Print Functionality
A typical receipt consists of various lines (also called fields). Any data (text/bitmap) you want to print on the receipt is a so-called printObject.
There are several ways to customize a print object to suit your needs. You could want your text to either be bold, have a larger outlook (title), be centralized on the paper or any combination of these.
The following steps will guide on how to achieve this.
Printing Text
To print text, you need to create a print object containing the text data. You will often have many lines of text so you would create multiple print objects. You would also need to create a list to hold these print objects.
It is this list of print objects that you will pass when calling the print function.
- Create a mutable list to hold print objects.
val printObjects = mutableListOf<PrintObject>()List<PrintObject> printObjects = new ArrayList<>();- Create a print object containing the text data you want to print.
val printObject1 = PrintObject.Data("...String to print...\n")PrintObject printObject1 = new PrintObject.Data("...String to print...\n");
Potential pitfall: Be sure to end your string data with a new line escape character, else the string data from the next print object will simply start from where the previous one ended.
- If you need to customize this text data further, you can create a custom configuration to be passed as an optional second parameter. Here, I have created two (2) - one for title text and another for field text. You can create as many as you want depending on the level of customization you need.
val titleConfig = PrintStringConfiguration(isTitle = true, isBold = true, displayCenter = true)

val fieldConfig = PrintStringConfiguration(isTitle = false, isBold = false, displayCenter = false)
PrintStringConfiguration titleConfig = new PrintStringConfiguration(true, true, true);
PrintStringConfiguration fieldConfig = new PrintStringConfiguration(false, false, false);- Create other print objects and pass in the configurations as a second parameter.
val printObject2 = PrintObject.Data("...String to print...\n", titleConfig)
val printObject3 = PrintObject.Data("...String to print...\n", fieldConfig)
PrintObject printObject2 = new PrintObject.Data("...String to print...\n", titleConfig);
PrintObject printObject3 = new PrintObject.Data("...String to print...\n", fieldConfig);- Add all the print objects you created to the list created earlier.
printObjects.add(printObject1)
printObjects.add(printObject2)
printObjects.add(printObject3)
printObjects.add(printObject1);
printObjects.add(printObject2);
printObjects.add(printObject3);- Initiate a print operation
IswPos.getInstance().print(printObjects, this)

//For Kozen terminals, add in this third parameter
IswPos.getInstance().print(printObjects, this, false)
IswPos.getInstance().print(printObjects, this);
//For Kozen terminals, add in this third parameter
IswPos.getInstance().print(printObjects, this, false);Like seen earlier with the pay function, we have implemented the call-back returned by this print function (the 2nd parameter) in the class directly. Below is a short sample and the overridden member functions.
As mentioned too, this can be done in an activity, fragment or any other class.
class MainActivity : AppCompatActivity(), IswPos.IswPrinterCallback {

  override fun onError(result: IswPrintResult) {
    // Handle error case
  }

  override fun onPrintCompleted(result: IswPrintResult) {
    // Handle print result
  }
}
public class MainActivity extends AppCompatActivity implements IswPos.IswPrinterCallback {
@Override
public void onError(IswPrintResult result) {
// Handle error case
}
@Override
public void onPrintCompleted(IswPrintResult result) {
// Handle print result
}
}Printing Images
The print functionality is also useful for printing images like logos, icons, and other bitmap images.
- Create a mutable list to hold print objects.
val printObjects = mutableListOf<PrintObject>()List<PrintObject> printObjects = new ArrayList<>();- Prepare your bitmap image. There are several ways of doing this in Android, but here is an efficient one.
val drawableRes: Int = R.drawable.Your_Drawable
val imageBitmap = BitmapFactory.decodeResource(requireContext().resources, drawableRes)
int drawableRes = R.drawable.Your_Drawable;
Bitmap imageBitmap = BitmapFactory.decodeResource(requireContext().getResources(), drawableRes);- Create a print object containing your bitmap image.
val imagePrintObject = PrintObject.BitMap(imageBitmap)PrintObject imagePrintObject = new PrintObject.BitMap(imageBitmap);- Add your print object to the list and initiate a print operation.
printObjects.add(imagePrintObject)

IswPos.getInstance().print(printObjects, this)
printObjects.add(imagePrintObject);
IswPos.getInstance().print(printObjects, this);- Implement the call back interface and override its member functions as shown earlier for text printing.
Proguard/R8 keep rules
If your app makes use of Proguard/R8 for code-shrinking and obfuscation, add the following keep rules to your Proguard rules.
-keep class org.slf4j.** { *; }
-dontwarn org.slf4j.**

-keep class org.simpleframework.xml.** { *; }
-keep interface org.simpleframework.xml.** { *; }
-keepattributes *Annotation*
-keepclassmembers class * {
   @org.simpleframework.xml.* *;
}

// Add this if you're integrating to Pax
-keep class com.pax.** { *; }
-dontwarn com.pax.**
Potential pitfall: Be sure to add these rules, else the app crashes at runtime because the needed classes may have been removed during code shrinking.
Sample application
Check out the sample application here to assist with integration. Navigate to the appropriate branch containing device-specific implementations. Be sure to look through the Gradle setup when configuring.
Updated 4 months ago