Web Checkout
Web Checkout is a simple way to integrate a checkout feature into your existing products. It is the fastest and easiest way to get paid online, with minimal code required for integration.
Why use Web Checkout:
- Ease of integration.
- Secured checkout experience.
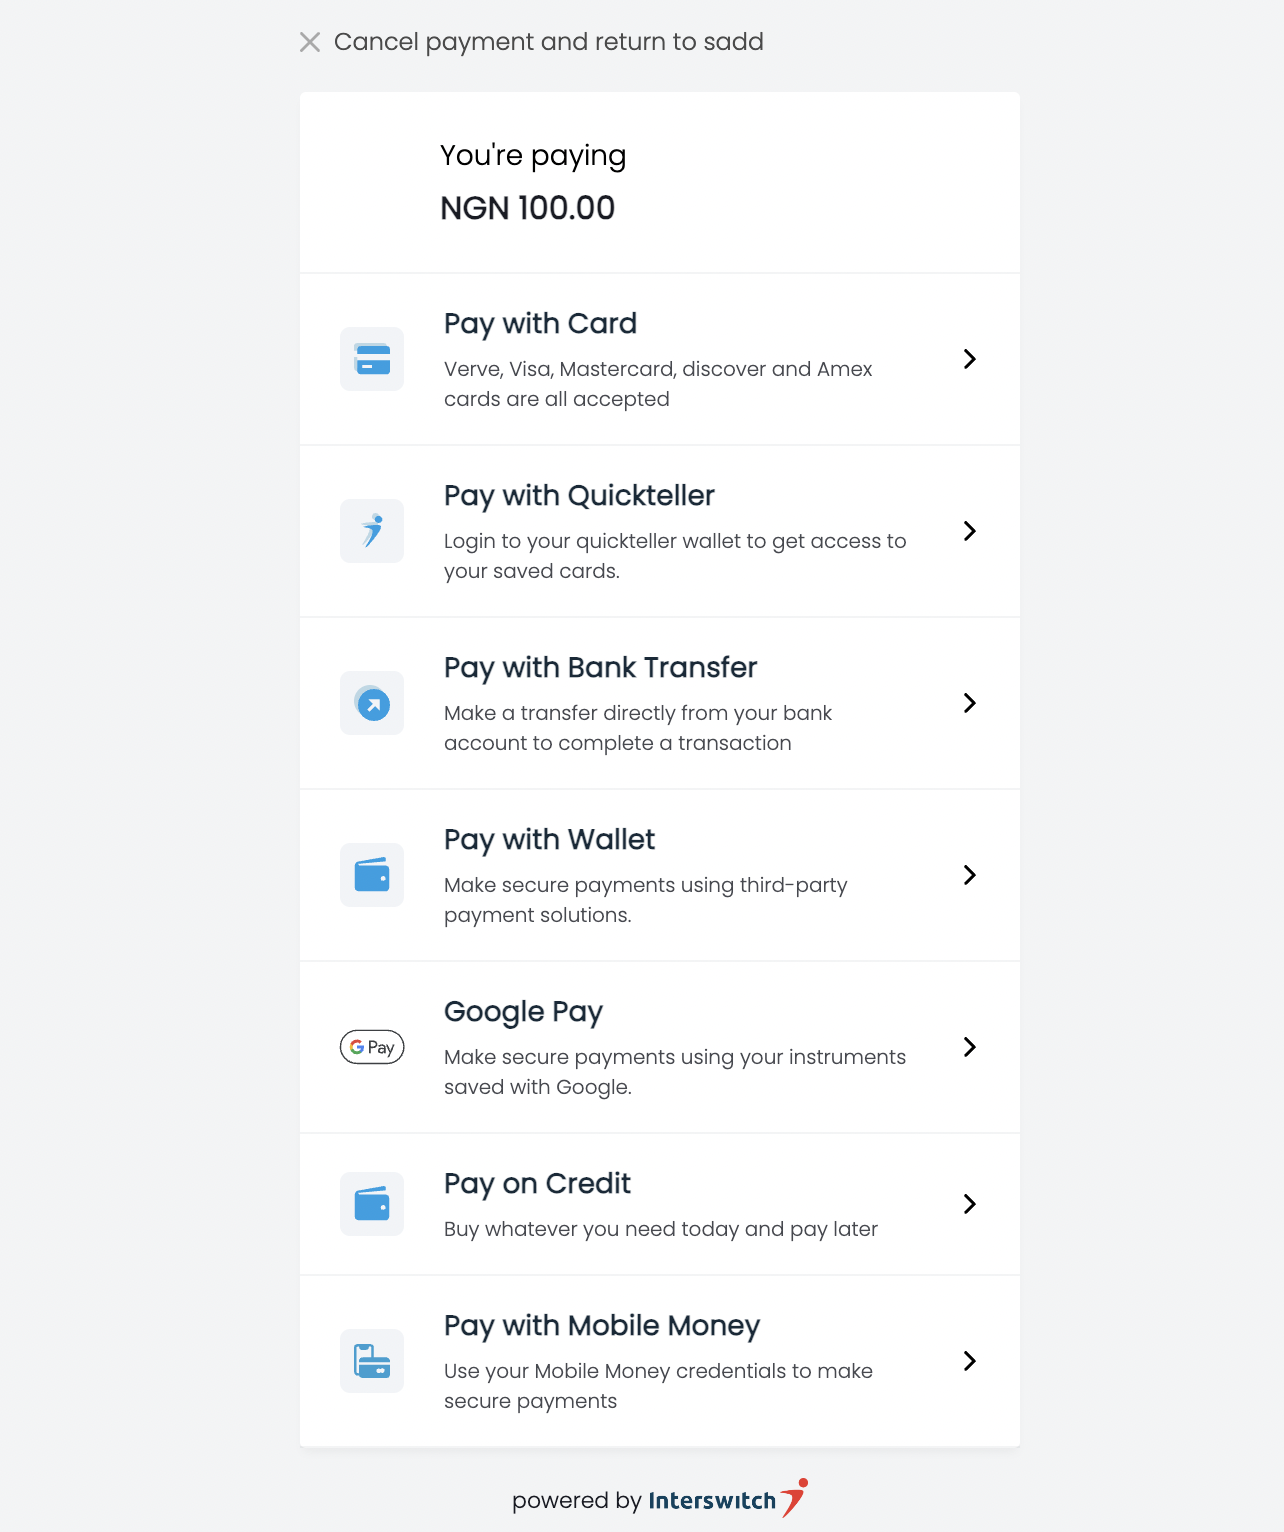
- Access to multiple payment options with a single integration (Eg, Card, Transfer, USSD, Wallet, GooglePay, etc.)
- Boost checkout completion using inline checkout. This means that using inline checkout makes it easier for customers to complete their purchases, leading to increased sales.
How to integrate Web Checkout
Integration options
There are two ways to integrate Web Checkout into your product:
- Inline Checkout: This allows the customer to complete payment without navigating away from your site.
- Web Redirect: This navigates the user away from your site to the Interswitch payment page. Users are redirected back to your site when they complete the transaction.
Test CardsClick here to get test cards to test your transactions.
Option 1 - Inline Checkout
With Inline checkout payment, a widget will open in a popup on your current page, without the need for a redirect. This allows the customer to complete payment without navigating away from your site.
To use Inline Checkout, include the inline checkout script at the bottom of your page's body as shown below
<body>
    ...
    <script src="https://newwebpay-sandbox.interswitchng.com/inline-checkout.js"></script>
<body>
Go LiveTo go live, change src value to 'https://newwebpay.interswitchng.com/inline-checkout.js'
To initiate checkout, call window.webpayCheckout(request). The request object contains your payment parameters.
A callback function will also be passed in to receive the response from the checkout.
Example of inline checkout implementation
//declare callback function
function paymentCallback(response) {
    console.log(response);
}

//sample payment request
var samplePaymentRequest = {
    merchant_code: "MX007",
    pay_item_id: "101007",
    txn_ref: "sample_txn_ref_123",
    site_redirect_url: "https://google.com/",
    amount: 10000,
    currency: 566, // ISO 4217 numeric code of the currency used
    onComplete: paymentCallback,
    mode: 'TEST'
};

//call webpayCheckout to initiate the payment
window.webpayCheckout(samplePaymentRequest);
Result of the code above.
That's it! If you want to see more sample code, check out this repository.
Below is a full list of inline checkout parameters
| Field Name | Data Type | Required | Description |
|---|---|---|---|
| pay_item_id | String | true | payable_code |
| pay_item_name | String | true | Name of the item being paid for |
| txn_ref | String | true | transaction reference |
| amount | String | true | Cost of the item you want your customer to pay (amount is in minor) |
| currency | String | true | ISO currency code |
| cust_name | String | false | merchant customer name |
| cust_email | String | True | merchant customer email |
| cust_id | String | false | merchant customer id |
| cust_mobile_no | string | false | merchant mobile number |
| merchant_code | String | false | The Merchant's code |
| site_redirect_url | String | false | Merchant's website redirect url |
| tokenise_card | String("true" or "false") | false | Flag to indicate whether you want the customer's card to be tokenised, a tokenised value would be returned when you requery to confrim the transaction status |
| access_token | String("true" or "false") | false | Access token value gotten from passport |
| mode | String("TEST" or "LIVE") | true | The mode of the payment |
| onComplete | Object (function) | true | The callback function that returns the state of a transaction. |
Option 2 - Web Redirect
With Web Redirect, the user will be navigated away from your site to the payment page after clicking The Make Payment button.

To use web redirect, include the following form on your checkout page:
<form
      method="post"
      action="https://sandbox.interswitchng.com/collections/w/pay" >
      <input name="merchant_code" value="MX6072" />
      <input name="pay_item_id" value="9405967" />
      <input
        name="site_redirect_url"
        value="https://example.com/payment-response"
      />
      <input name="txn_ref" value="12344grtr" />
      <input name="amount" value="10000" />
      <input name="currency" value="566" />
      <input type="submit" value="Make Payment" />
    </form>
Go LiveTo go live, change post URL to 'https://newwebpay.interswitchng.com/collections/w/pay'
When you submit the form, it will be redirected to the Interswitch payment page.

When the user completes the transaction, the user will be redirected to this site_redirect_url value="https://example.com/payment-response" URL you provided on in the code below.
You can view our sample project that shows how to integrate using Web Redirect here.
Payment Request Parameters
| Field Name | Data Type | Required | Description |
|---|---|---|---|
| merchant_code | String | true | Merchant Code on Quickteller Business |
| pay_item_id | String | true | Pay item ID on Quickteller Business |
| txn_ref | String | true | Unique merchant reference for the transaction |
| amount | Integer | true | Cost of the item you want your customer to pay for in minor |
| currency | String | true | ISO currency code |
| cust_name | String | false | Name of the customer paying |
| cust_email | String | True | Email address of the customer paying |
| cust_id | String | false | Unique identifier of the customer on the merchant's system |
| pay_item_name | String | false | Name of the item being paid for |
| site_redirect_url | String | true for redirect integration | Merchant URL for the customer to be redirected to after completing payment |
Redirect Notification
After a transaction is completed, the gateway sends a redirect notification to the site_redirect_url provided in the payment request via an HTML form POST. This is a browser-side redirect . The customer's browser submits the form to the merchant's URL automatically.
Important: The response parameters in this redirect should not be used to determine transaction outcome. Merchants must perform a server-side requery using the
txnrefto get the authoritative transaction status.
Request Details
| Property | Value |
|---|---|
| Method | POST |
| Content-Type | application/x-www-form-urlencoded |
| Trigger | Browser redirect after payment attempt |
Parameters
| Parameter | Type | Description | Example |
|---|---|---|---|
txnref | String | Unique transaction reference. Use this for server-side requery. | isw_demo_1773086527888 |
amount | Integer | Transaction amount in the lowest currency denomination (e.g. kobo) | 2002 |
resp | String | Response code. Do not rely on this — perform a requery instead. | 00 |
desc | String | Human-readable description of the response | `Approved by Financial Institution |
Sample Raw POST Body
txnref=isw_demo_177308xxx&amount=2002&apprAmt=2002&resp=00&desc=Approved+by+Financial+Institution&retRef=187076458602Confirming Transaction Status
You need to make a server-side request to get the transaction status and amount that was paid before giving value. You make the request using your merchantCode, the relevant transaction reference and amount. Please confirm the amount returned by our server matches your original transaction amount before giving value.
Transaction ConfirmationAfter payment completion, you MUST make a server-side request to get the transaction status and amount that was paid before giving value.
Sample Request
curl https://sandbox.interswitchng.com/collections/api/v1/gettransaction.json?merchantcode={merchantcode}&transactionreference={reference}&amount={amount}
 LIVE BASE URL: https://webpay.interswitchng.com
-H "Content-Type: application/json" \
-X GET
Sample Response
{
    "Amount": 66666600,
    "CardNumber": "",
    "MerchantReference": "933437251484",
    "PaymentReference": "UBA|API|MX187|25-07-2018|249510|719456",
    "RetrievalReferenceNumber": "000647661227",
    "SplitAccounts": [],
    "TransactionDate": "2018-07-25T06:57:24",
    "ResponseCode": "00",
    "ResponseDescription": "Approved by Financial Institution",
    "AccountNumber": "9999999999"
}
Response CodesYou can view the list of response codes and their meaning here.
WebhooksInstead of calling our API to confirm the status of a transaction, you can enable webhooks, and configure a URL where we make a POST request to every time a transaction status changes. You can view the guide here
Updated 3 months ago